Revoke authorization
Once the buyer completes the authorization process, you are required to grant your buyer the ability to revoke authorization for the following reasons:
- To empower the buyer with full control over their authorized agreements, enabling them to terminate the authorization relationship at any time based on their account security strategy or service usage requirements.
- Certain payment methods impose system-level restrictions, which may limit a single e-wallet account to only one or a small number of valid authorization credentials with the same merchant.
Handle authorization revocation
Below lists the possible scenarios for buyers to revoke authorization. You need to perform different actions based on the specific scenario:
- If the buyer initiates the revocation on the merchant side, you need to call the revoke API.
- If the buyer revokes authorization on the payment method side, you will receive a notification after the revocation is successful.
Revocation on the merchant side
If the buyer revokes authorization within your application, you need to call the revoke API to invalidate the payment token (accessToken) of the payment method.
Pass the payment token (accessToken) corresponding to the Auto Debit service in the API request. Upon successful API invocation, the payment token (accessToken) will be invalidated. The code below shows a sample of calling the revoke API:
public static void Cancel() {
    AlipayAuthRevokeTokenRequest alipayAuthRevokeTokenRequest = new AlipayAuthRevokeTokenRequest();

    // replace with your accessToken
    alipayAuthRevokeTokenRequest.setAccessToken("281010033AB2F588D14B43238637264FCA5Axxxx");

    AlipayAuthRevokeTokenResponse alipayAuthRevokeTokenResponse = null;
    try {
        alipayAuthRevokeTokenResponse = CLIENT.execute(alipayAuthRevokeTokenRequest);
    } catch (AlipayApiException e) {
        String errorMsg = e.getMessage();
        // handle error condition
    }
}
The following code shows a sample of the request message:
{
  "accessToken": "281010033AB2F588D14B43238637264FCA5Axxxx"
}
The following code shows a sample of the response message:
{
  "result": {
    "resultCode": "SUCCESS",
    "resultStatus": "S",
    "resultMessage": "Success"
  }
}
The table below shows the possible values of result.resultStatus in the response message of the revoke API, please handle the result according to the guidance provided. You can also process the revocation result based on the notification from notifyAuthorization.
result.resultStatus | Message | Further action |
| Revocation is successful. | No further action is needed. |
| Unknown revocation status. | Please use the same accessToken and call the API again or wait for the asynchronous notification. If the issue persists, contact Antom Technical Support. |
| Revocation failed. | Please check and verify whether the current API required request fields (including header fields and body fields) are correctly passed and valid. |
Note: If no response is received, it may indicate a network timeout. Please use the same accessToken and call the API again. If the issue persists, contact Antom Technical Support.
Revocation on the payment method side
If the buyer revokes authorization on the payment method side, you will receive a revocation notification from notifyAuthorization. To receive asynchronous notifications for authorization revocation, configure the address for receiving notifications from notifyAuthorization in advance.
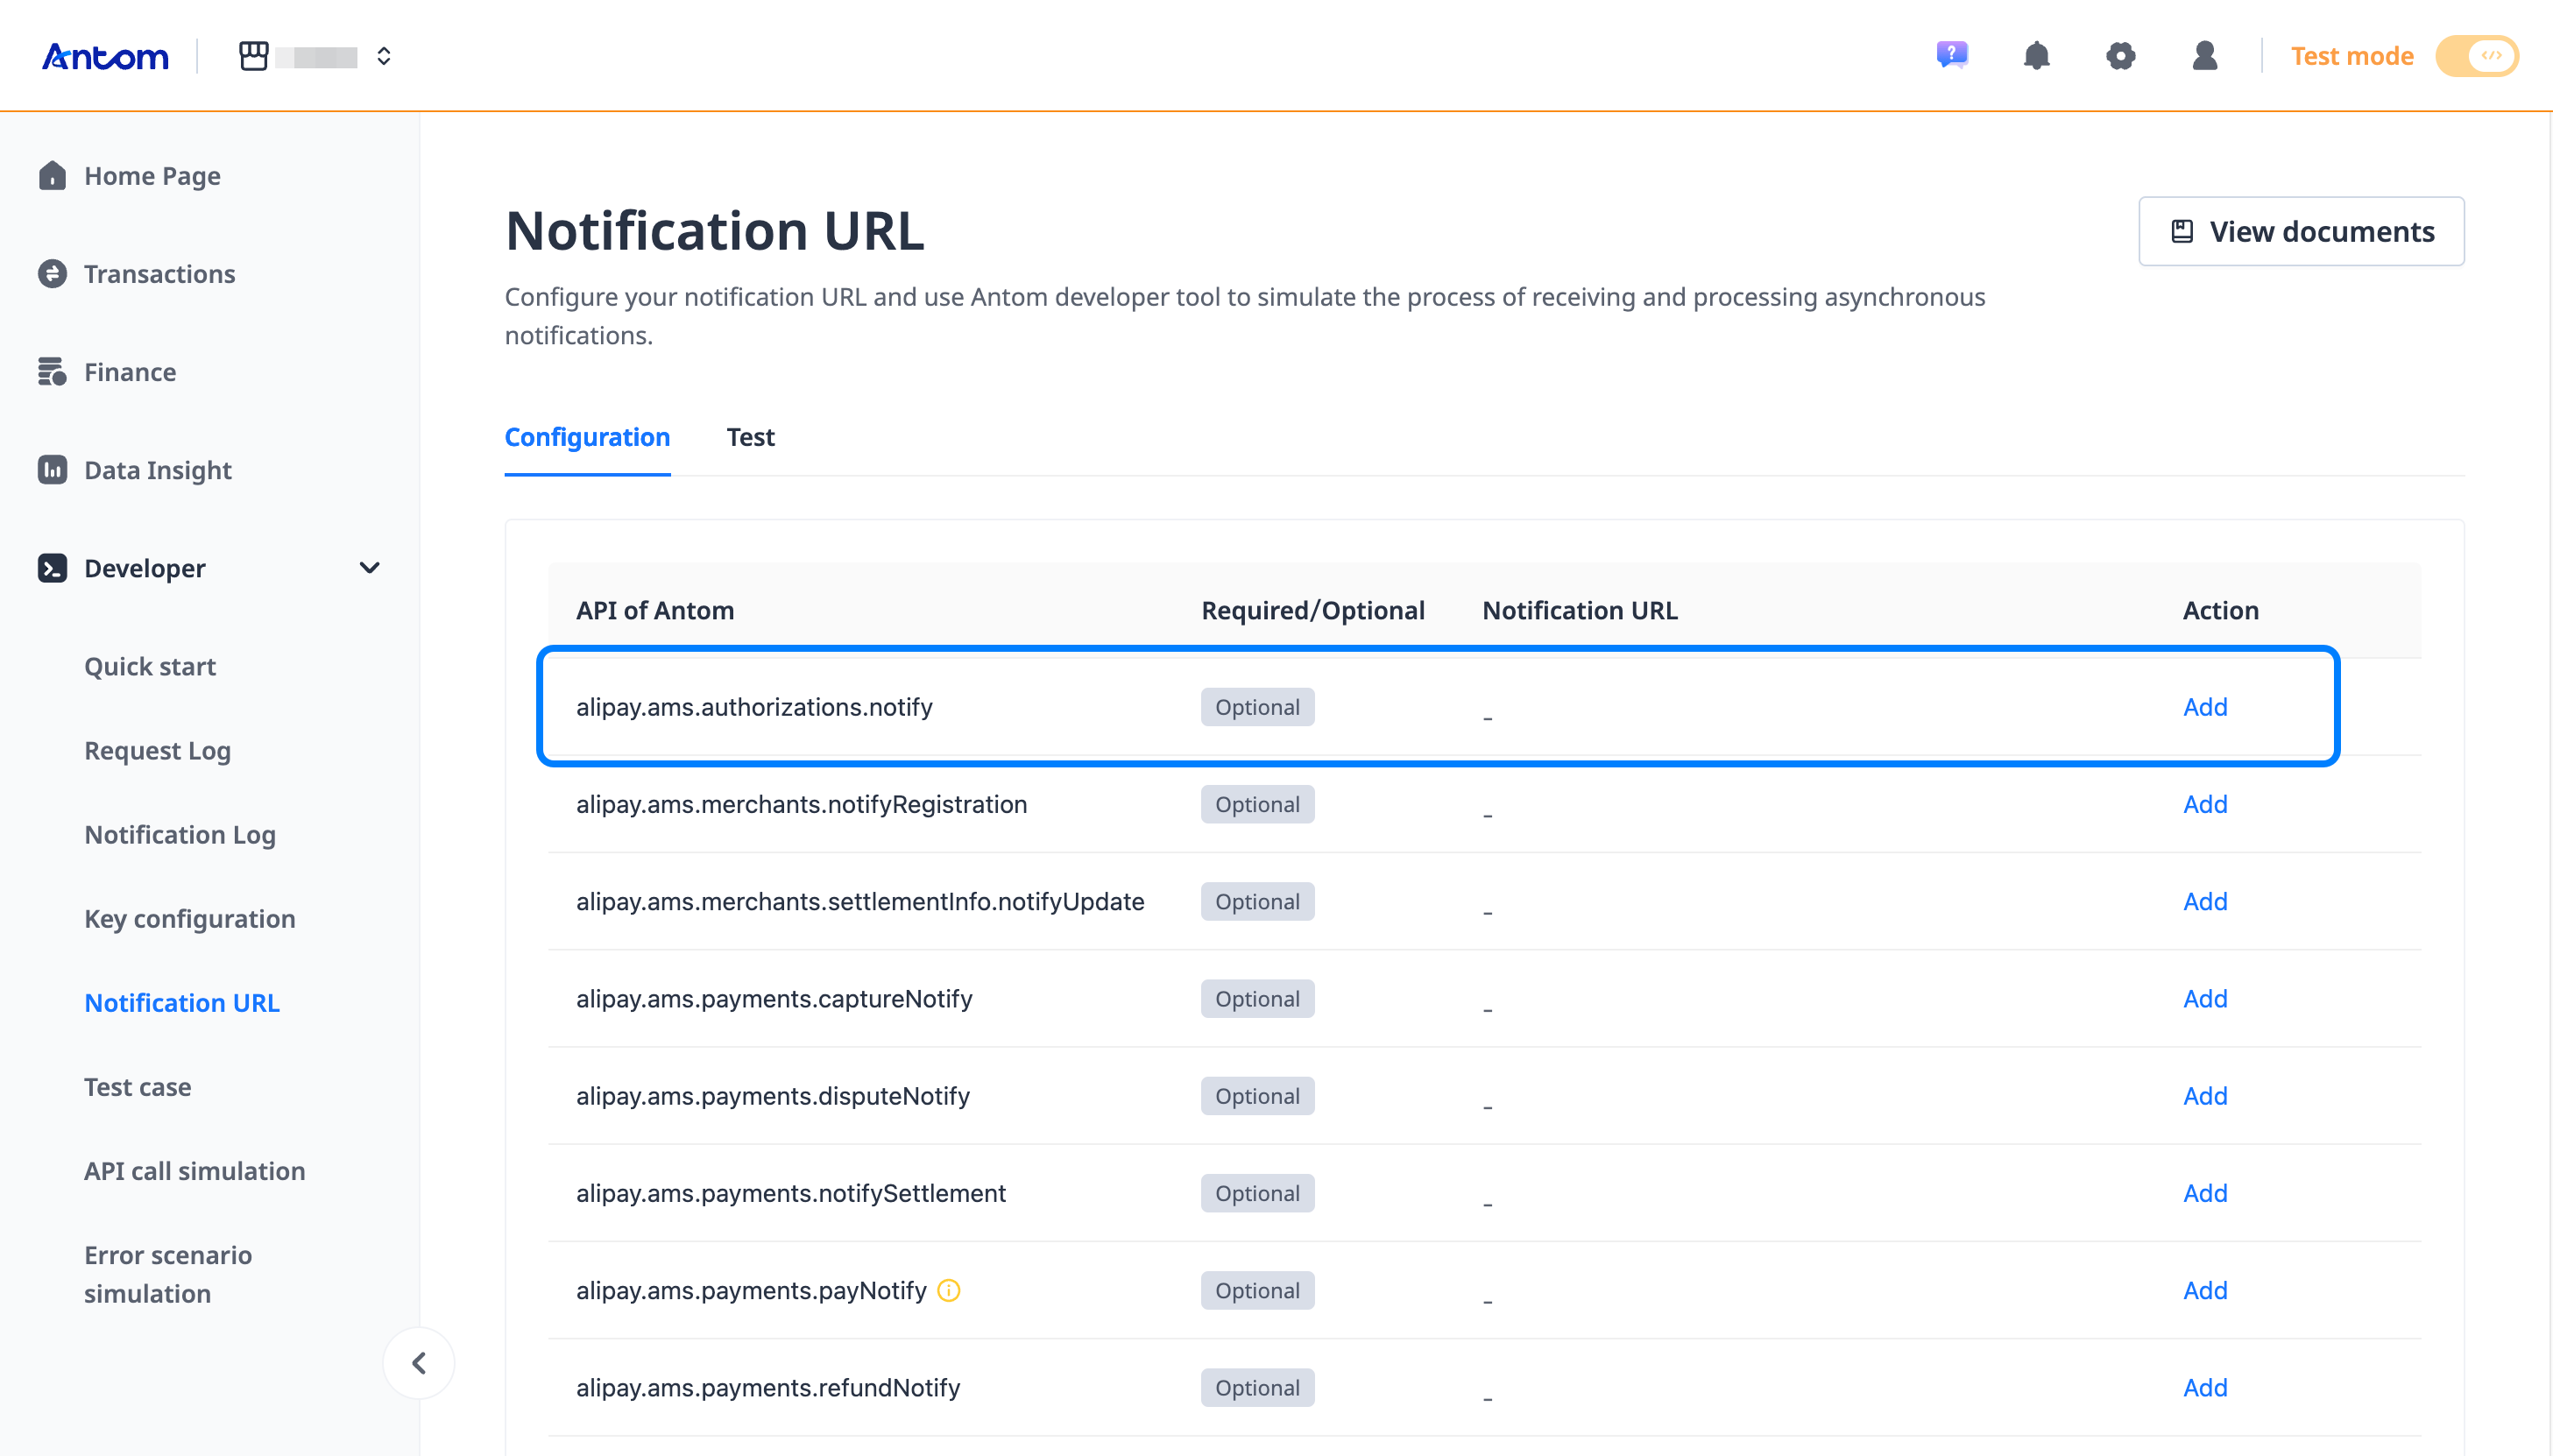
- Configure the webhook URL to receive the asynchronous notification of authorization. Go to Antom Dashboard > Developer > Notification URL, and add notification address for the alipay.ams.authorizations.notify API. For detailed steps, refer to Notification URL.

- After the buyer revokes authorization, you will receive an authorization notification from notifyAuthorization, specifying the payment token (accessToken) of the successfully canceled Auto Debit service. If you receive that asynchronous notification from Antom, you are required to return the response in the Sample code format, but you do not need to countersign the response.
The following code shows an example of the asynchronous notification request:
{
  "authorizationNotifyType": "TOKEN_CANCELED",
  "accessToken": "281010033AB2F588D14B43238637264FCA5Axxxx",
  "result": {
    "resultCode": "SUCCESS",
    "resultMessage": "success",
    "resultStatus": "S"
  }
}
Handle the result based on the value of result.resultStatus (only returns S) in the authorization notification request:
S: Indicates the revocation is successful and returns the following fields:
- accessToken: The Auto Debit ID generated by Antom for subsequent payments.
- authorizationNotifyType: Only returns
TOKEN_CANCELEDin this scenario, indicating that the authorization is revoked. Upon receiving this notification, you need to terminate the contractual relationship with the buyer in your system.
- You need to verify the signature of the authorization notification sent by Antom:
/**
 * receive notify
 *
 * @param request    request
 * @param notifyBody notify body
 * @return Result
 */
@PostMapping("/receiveNotify")
@ResponseBody
public Result receiveNotify(HttpServletRequest request, @RequestBody String notifyBody) {
    // retrieve the required parameters from http request
    String requestUri = request.getRequestURI();
    String requestMethod = request.getMethod();

    // retrieve the required parameters from request header
    String requestTime = request.getHeader("request-time");
    String clientId = request.getHeader("client-id");
    String signature = request.getHeader("signature");

    try {
        // verify the signature of notification
        boolean verifyResult = WebhookTool.checkSignature(requestUri, requestMethod, clientId,
                requestTime, signature, notifyBody, ANTOM_PUBLIC_KEY);
        if (!verifyResult) {
            throw new RuntimeException("Invalid notify signature");
        }

        // deserialize the notification body
        JSONObject jsonObject = JSON.parseObject(notifyBody);
        String notifyType = (String)jsonObject.get("notifyType");
        if("TOKEN_CANCELED".equals(notifyType)){
            AlipayAuthNotify authNotify = jsonObject.toJavaObject(AlipayAuthNotify.class);
            if (authNotify != null && "SUCCESS".equals(authNotify.getResult().getResultCode())) {
                // handle your own business logic.
                // e.g. Dissolve the relationship between accessToken and user.
                System.out.println("receive auth notify: " + JSON.toJSONString(authNotify));
                return Result.builder().resultCode("SUCCESS").resultMessage("success.").resultStatus(ResultStatusType.S).build();
            }
        }
        // other types of notifications

    } catch (Exception e) {
        // handle error condition
        return Result.builder().resultCode("FAIL").resultMessage("fail.").resultStatus(ResultStatusType.F).build();
    }

    return Result.builder().resultCode("SYSTEM_ERROR").resultMessage("system error.").resultStatus(ResultStatusType.F).build();
}
- Each notification request must be responded to in the format specified below:
{
    "result": {
        "resultCode": "SUCCESS",
        "resultStatus": "S",
        "resultMessage": "success"
    }
}
